Happy Birthday to Me!
Happy Birthday to me!
Yesterday I turned a year older! One more year of craftiness under my belt! Woo hoo!
I had a great birthday, just in case you were wondering. AND I have a birthday surprise for you all! It’s actually not quite ready yet, but SOON! Soon, soon, soon. Maybe even this week! So, stay tuned, folks!
How To Make Lined Curtains
UPDATE: Oct 27, 2013 – Thanks for all the great comments! This post has been incredibly more popular than I ever imagined. Wow! Thanks for visiting and feel free to poke around. Even though it’s kind of dusty around here, I’m hoping to be adding more soon.
I hope I’ve been able to answer all your questions – some other very helpful folks have also left answers in their comments – I’ve tried to incorporate most of these into the tutorial but feel free to ask any more that I’ve missed. I read and appreciate each one! :) Now go enjoy your beautiful curtains!
Making your own curtains is easy-peasy, and making lined curtains is just one step up from the plain ol’ kind (and lined curtains last longer, provide a better screen for hot sunlight, and probably have some other benefits I’m not thinking of right now).
One side-effect I didn’t really expect is that making your own curtains is also very gratifying. I would recommend it on that point alone, although I also very much appreciate the economical points as well. In my world of work that is constantly undone, it’s so nice to have something that I can look at that I can think to myself, “Yeah! I did that! And look! It’s still done!” Kind of hard to wrap my mind around, come to think of it. Anyway, as I go from changing a diaper to washing the dishes, it’s nice to have a reminder that some of my efforts stick around for a bit longer.
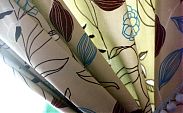
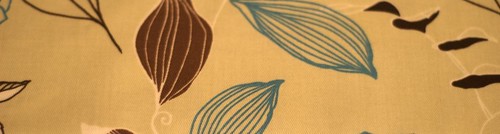
When buying fabric for curtains, I recommend splurging and buying the fabric that you really want, not just whatever is cheapest. I know it’s sometimes hard, (it is for me anyway) to buy the nice upholstery weight fabric when just yards away (heehee! get it? – sorry, I’m a bit punchy tonight) is sitting a perfectly “alright” fabric for half the price or less. But this curtain is going to make a huge impact on your room. So go for the stuff you really like (if you’re watching your pennies, you can wait for a sale or coupon). Buy your liner fabric based on the intensity of the light you are trying to block. They sell “black out” liner, good especially in bedrooms where you want to block out the maximum amount of light. I just bought the regular stuff; perfect for my purposes.
For this tutorial, I’ve used the measurements I used to make floor-length curtains for my own window, which is 67” wide x 49” tall, with the curtain rod about 87” off the floor. However, you can easily adapt these instructions for any size window. Also, please read through the instructions before you start – you may find something I did that you would rather do differently and need to adjust accordingly.
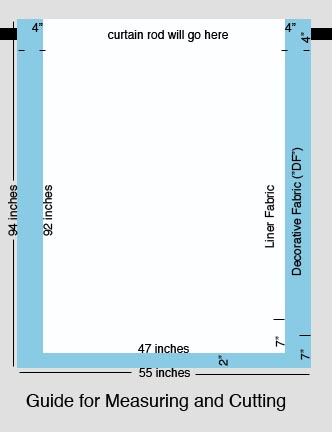
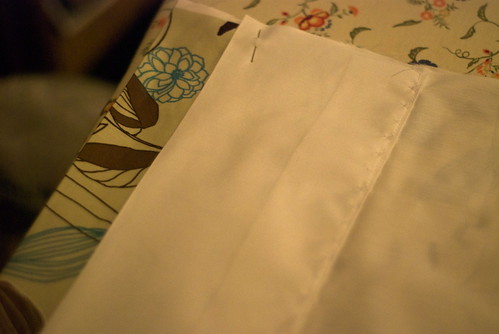
1. Cut your fabric. I want my curtains to be a little long so I cut my decorative fabric (hereafter referred to as “DF”) 94” x 55”, and cut the liner 92” x 47” (2” less than the DF at the bottom, and 4” less on either side), leaving room for a 7” hem at the bottom of each, and 4-6” for the rod pocket at the top.
_UPDATE: A handy rule of thumb here – figure out how long you want your finished curtain to be, then add the extra inches you need for your rod pocket at the top and your hem at the bottom (in this case, my “formula” for the DF looked like this: fabric length = finished length + 4”[rod] + 7”[hem]). Then you can figure out the measurements for the liner fabric based on that.
Also, Sheila (comment #51) has some good points about curtain width._
Now you get to start the fun part – sewing! :u)
2. Hem both the DF and the liner. With the wrong side facing you and the edge of the fabric intended for the lower edge of the drape pointed toward you, fold the bottom edge up 2” and press, then 5” more and press.
3. Now you are going to do something called a “blind hem”. If you’ve never done one before, this video by Jenny T. (I don’t know who she is, but she makes a mean “how to” video!) is a helpful tool to give you an idea of what it is and how to do it:
(note: The video says to do this hem you need to get a special blind hem foot for your sewing machine. In actuality, you don’t really need a special foot to do this hem, but I imagine it would be helpful. When I did this project I actually didn’t realize there was such a thing as a blind hem foot, and just used my regular presser foot, while sewing carefully – I think I used the inside curve of the foot as a guide. My hem was perhaps a teensy bit more wobbly than it would have been otherwise, but I think it turned out fine)
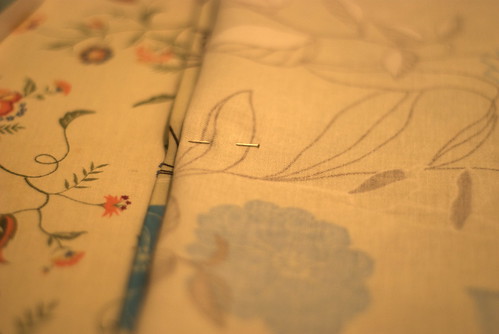
Here’s my hem, all set up for me to sew it up with my super-special blind hem stitch (Actually I have a very basic machine, so I imagine nearly all machines have this stitch or something comparable or better. But don’t tell my sewing machine. It thinks that it’s a super special blind hem stitch, and we might as well let it. It just makes my sewing machine so happy.)
If all this nonsense about blind hems just makes your head hurt, just do a regular hem – follow step 1 as directed, and then just go ahead and sew a straight seam across. I do encourage you to try, though – it wasn’t as hard as I thought it would be, and it gave me a great sense of accomplishment. And I learned how to sew a blind hem!
4. Now, sew up the sides with a 1/2” seam allowance. This isn’t tricky at all – just turn both your DF and the liner right side together (as if you were making a pillow), and sew up both sides. Make sure you match up the edges of the fabric from the top down.
You will end up with extra DF at the bottom and center. This is okay. It’s all part of the plan. I like lots (okay, 2”) of extra DF at the bottom (I think I saw a hanging curtain like that once – I don’t know if there’s a reason for the extra fabric), but if you prefer less, you can plan accordingly (cut more liner, or hem it up less).
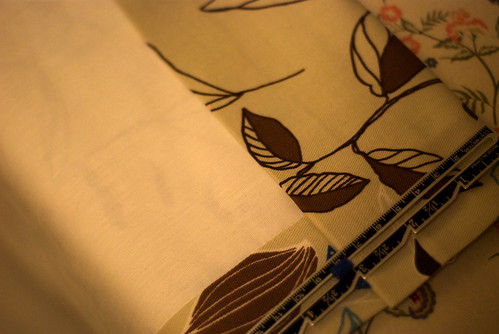
5. Turn everything right side out, and press. You will have extra DF; make your crease with 2” (on either side) of the extra DF. This is where the extra 2” in the cutting guide image above comes in handy. Take a look at it if you’re confused.
6. Next, you want to sew a seam all the way down both sides, to hold the crease you just made in place.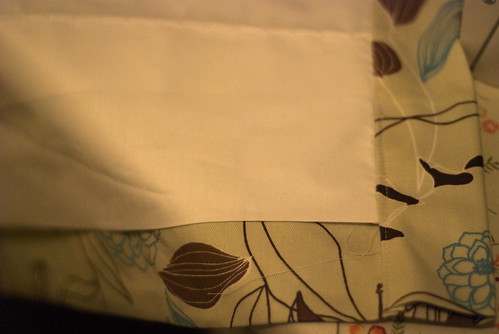
7. Lastly, make the pocket for your curtain rod. Fold the top (both the liner fabric and the DF) over 1” and press, and 3 more inches and press again. Sew along the bottom of this tube, making a tube that is about 3” tall.
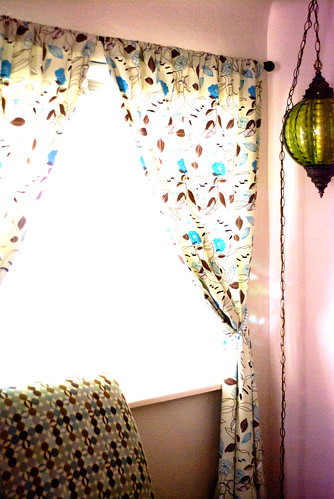
Yay! You’re done! Hang your curtain and step back and admire your brilliant (and lasting!) handiwork!
Feel free to add your own recommendations and/or corrections to my instructions in the comments (I really appreciate these, so don’t hold back!)
Up To
This morning has been very peaceful. Bridget has been taking a nice long nap, and I have been on my computer, enjoying the quiet, happily clicking my way through blogs that I normally have to skim or skip over entirely. A nice lazy morning.
Then, about 5 minutes ago I realized what I was doing. Ack! I have diapers to put on the line! The house is a mess! The dishwasher needs to be emptied! I need to pack…iron…my thoughts stumbled over each other and tumbled into a heap. Does that ever happen to you? You have so many thoughts at once that your brain refuses to process them all and so they just get thrown on the “later” pile?
All is not lost, though. Bridget continues to nap, and, although I expect her to wake up at any moment, I do have the most important item checked off my mental list/heap. The diapers are in the sunshine, drying off, and although they probably won’t be dry by the time she wakes, I can always use a disposable. I doubt the world will come to an end.
In the meantime, as the rest of my list waits, I thought I’d update you on what I’m up to (besides juggling a baby who, as Brian puts it, is becoming “frighteningly mobile” – now rolling over both ways with ease, and grabbing at anything – including my computer keyboard – within her reach).
1. Regular stuff: this is the stuff that is the most boring, but takes up the most of my time. Laundry, cleaning, cooking and the like. I’ll spare you the gruesome details.
2. Summertime activities! Getting together with family and friends, gardening, etc. We have a lot of fun get-togethers coming up, which might make me a little scarcer than usual, blog-wise.
3. This month, a Fabric Swap at Oh, Fransson!
Bridget and I took a little field trip to arc, a thrift store, and picked up some nifty vintage-looking sheets.

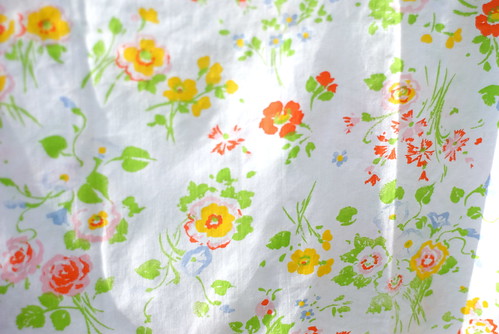
I hope I got the right thing. This is my first swap, and I’m a bit nervous that I’m going to mess it up. But how hard can it be, really?
I washed the sheets last night but, even though I hung them on the line all night to dry/air out, they still have that weird thrift-store smell. Ick. I might have to wash them again on hot or something.
Anyhow, I’m very excited about the swap, and hope to get my squares cut and sent soon – sometime this week would be nice, but possibly not realistic. Next week?
That’s about it. We’re traveling this weekend, so I’m getting ready for that. It’ll be Bridget’s first plane trip, an experience I anticipate with no small amount of trepidation. Any fool-proof techniques, tips, or even just ideas?
And now, just because I can’t resist:

Deep Breath
I’ve slowly been recuperating from the craziness that was the week leading up to the Big Party (a.k.a. Bridget’s baptism and the reception that followed at our house). It was really cool, and a very meaningful time for us. I hope someday we can explain clearly to her the significance of that event.
I have yet to go through my pictures, but here is one from later in the week, when we went to the pool with her Yia Yia (Grandma), who flew into town for the occassion.

In other news, Andrea over at Knitty Bitties tried out the Nike + iPod Tutorial that I made a while back. Check out the adorable results of her efforts here. She found a couple of weaknesses with the instructions, so if you had problems with them before, check back – I think they are more clear now.
That’s it for now! We continue to be pretty busy, but hopefully I will be more faithful about posting in spite of that! Post a Day in July isn’t nearly as catchy as Post a Day in May, but I would like to at least post every other day.
Oh! I almost forgot! On Saturday Bridget is going to her very first birthday party! Her cousin is turning 1 whole year old, and is having a (kiddie) pool party! So you can be looking for some Ultra Adorable pictures of that event.
Amy Butler Lotus Cami Complete
Hurray! My top is all done. Actually, it was done last night, but my hair was funky then, and although it’s still kinda weird I couldn’t wait any longer to show you.
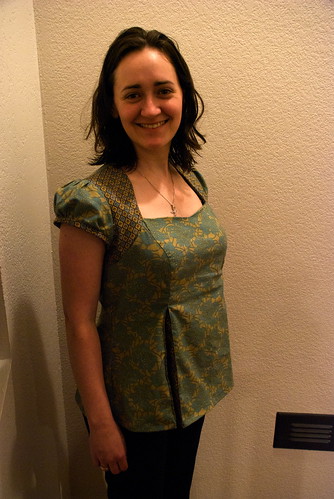
I made some changes in the pattern so that I can more easily feed Bridget when I’m wearing it (without the changes I would have had to basically undress every time she needed to nurse). I basically just sewed in two triangles to the front and made it into a kind of pleat. I’m a tad disappointed in how boxy it turned out, but I guess I’d rather it be boxy than not work with breast feeding.
If I somehow end up with gobs of time in between now and Bridget’s baptism (the intended debut for the top), maybe I’ll make another less boxy top. Somehow I doubt that will happen though. And I really am pleased with it. I think it will look really nice with my pearl necklace (which is MIA – uh oh!)
Ah, the drama of my life continues! :)
I should get to bed – Bridget and I are making an appearance at a breakfast in the morning, so no sleeping in super late like I did this morning!
Good night, all (or, if you are sensible and reading this in the a.m., Good Morning!)
Again?!
(Yes, it’s Thursday morning, and no, I haven’t gone to bed yet so it doesn’t count! I’m still blissfully in Wednesday-land…)

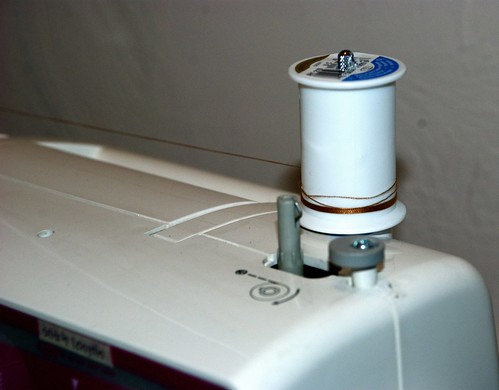
Yes, indeed. I am yet again out of thread! This is all that was left. Even the bobbin thread was all gone! Crazy, huh? GOOD THING I’M DONE!!!
I kid you not! I’ve been sewing like a madwoman over here, and I’m FINALLY done with my cute little Amy Butler Cami! I’ll post a picture tomorrow when my hair (hopefully) is all done looking funky. G’night, all!
Crafting Heroes
Check out this nifty set of interviews with the “success stories” of the crafting world. A little dream of mine is to someday have some kind of crafty side-business – all the more excuse to do what I love, right? These interviews offer encouragement and advice to other with that same dream.
Go for it, girls!
Amy Butler Lotus Cami
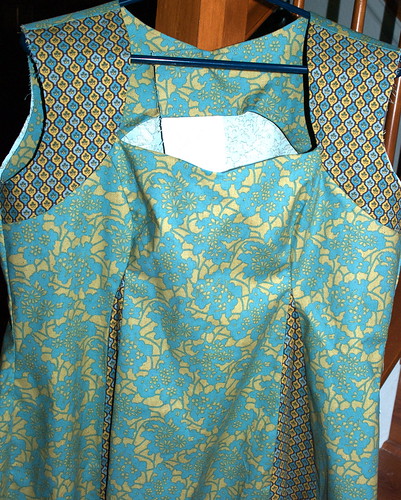
So I made some great progress last night on the top. You can see, almost all the parts are sewn on (except sleeves – it’s going to have little cap sleeves), I just need to finish up the edges and sew on a couple extra things. And buttons. Those would be useful. Anyway, as I was saying before I so rudely interrupted myself, I made some great progress. And I was merrily sewing along, trying to ignore how late it was getting, and then…
Waugh, waugh, waugh.
My trusty thread suddenly and tragically ran out.
The end.
Actually, I was going to go and pick up some more today, but unfortunately for that plan (and very fortunately for my dirty house and my sanity), Bridget had a really really nice nap this afternoon. Better than she’s had in over a week. So no fabric store for us. But fewer dust bunnies, a clean toilet (one of those things you never really appreciate until you don’t have it), and lots of sanity. A pretty good trade, if you ask me!
Since I haven’t actually sewn any outside seams yet, I might be able to just use a different tan color thread and fool everyone into thinking that I used it for the whole project. Except for you. You would know, but you won’t tell, right? It’ll just be our little secret.
Making A Top
Since finishing Brian’s bag, I’ve been working on sewing a top for myself. The idea is I’ll wear this to Bridget’s baptism (coming right up in a few weeks!) I had to make a muslin (sewing lingo for making a test copy in cheap fabric before doing the real deal). I had to do this for multiple reasons: not only is this is the first time I’ve used this pattern, but I’m also making some tweaks to the pattern to hopefully make it easier to wear while nursing. Also the only other time I’ve made a fitted top like this was that time (I think I was in high school) when I started making a dress and never finished because I didn’t buy the right zipper. So never. This is my first fitted top.
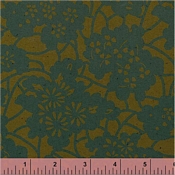
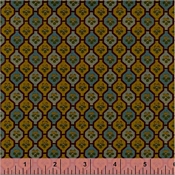
I had so much fun picking out the fabric for this. It calls for two fabrics, so we’re already talking twice the fun! I ended up buying these. Except they don’t look quite so green in real life.
With any luck I’ll manage to sew everything right-side up, and if it fits, well that’s just a bonus! :u)
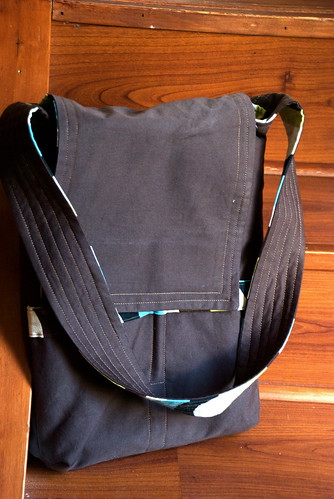
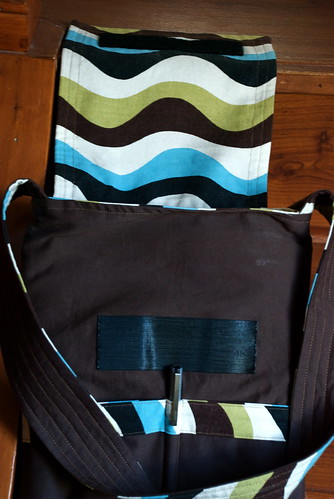
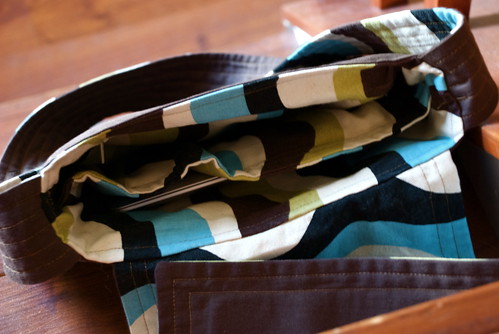
Messenger Bag
Here is the messenger bag I made for Brian – FINISHED! (Except for the strap – I’m making a new one as this one is too short for him).
Also, some VERY exciting news – for Mother’s Day one of Brian’s gifts to me was a gift certificate to Sew Mama Sew, and the BEAUTIFUL fabric that I bought with that came in the mail today! WOOHOO! It’s packaged so beautifully, I had to take a picture before I tore into it:
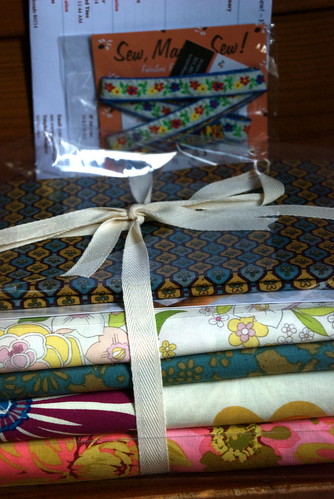
See the little card they included (in the background)? With some pretty ribbon thrown in for free? And the way they bound up the fabric with a little bow…it’s the little details like that that make me want to order from them over and over again.
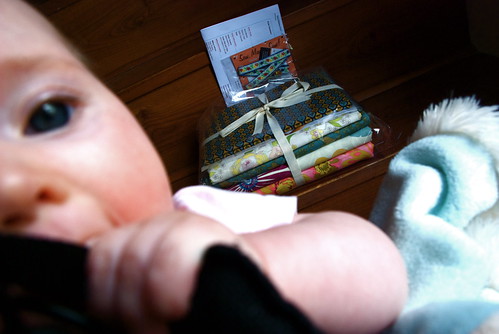
Oh, and here’s a shot of my little helper. She was thoughtfully holding onto the camera strap for me. Which was great, because in between holding her and holding the camera, how was I supposed to hold the strap? And the strap obviously needed to be held…and maybe gnawed a bit…
I took a couple of other photos but forgot to download them to Flickr. So maybe tomorrow for those. With new fabrics to enjoy, I can’t be expected to sit at this desk any longer! G’night!