
How To Make Lined Curtains

I hope I've been able to answer all your questions -- some other very helpful folks have also left answers in their comments -- I've tried to incorporate most of these into the tutorial but feel free to ask any more that I've missed. I read and appreciate each one! :) Now go enjoy your beautiful curtains!
Making your own curtains is easy-peasy, and making lined curtains is just one step up from the plain ol' kind (and lined curtains last longer, provide a better screen for hot sunlight, and probably have some other benefits I'm not thinking of right now).
One side-effect I didn't really expect is that making your own curtains is also very gratifying. I would recommend it on that point alone, although I also very much appreciate the economical points as well. In my world of work that is constantly undone, it's so nice to have something that I can look at that I can think to myself, "Yeah! I did that! And look! It's still done!" Kind of hard to wrap my mind around, come to think of it. Anyway, as I go from changing a diaper to washing the dishes, it's nice to have a reminder that some of my efforts stick around for a bit longer.
When buying fabric for curtains, I recommend splurging and buying the fabric that you really want, not just whatever is cheapest. I know it's sometimes hard, (it is for me anyway) to buy the nice upholstery weight fabric when just yards away (heehee! get it? -- sorry, I'm a bit punchy tonight) is sitting a perfectly "alright" fabric for half the price or less. But this curtain is going to make a huge impact on your room. So go for the stuff you really like (if you're watching your pennies, you can wait for a sale or coupon). Buy your liner fabric based on the intensity of the light you are trying to block. They sell "black out" liner, good especially in bedrooms where you want to block out the maximum amount of light. I just bought the regular stuff; perfect for my purposes.
For this tutorial, I've used the measurements I used to make floor-length curtains for my own window, which is 67" wide x 49" tall, with the curtain rod about 87" off the floor. However, you can easily adapt these instructions for any size window. Also, please read through the instructions before you start -- you may find something I did that you would rather do differently and need to adjust accordingly.
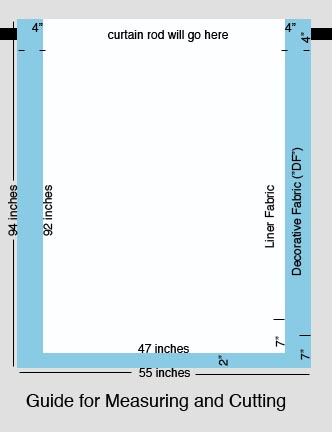
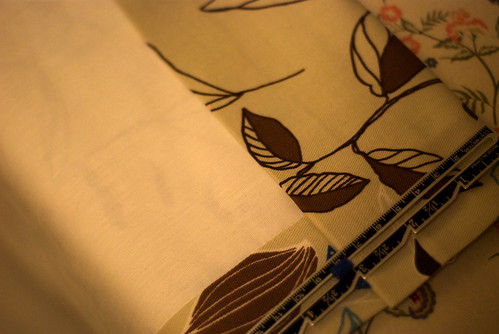
- Cut your fabric. I want my curtains to be a little long so I cut my decorative fabric (hereafter referred to as "DF") 94" x 55", and cut the liner 92" x 47" (2" less than the DF at the bottom, and 4" less on either side), leaving room for a 7" hem at the bottom of each, and 4-6" for the rod pocket at the top.
UPDATE: A handy rule of thumb here -- figure out how long you want your finished curtain to be, then add the extra inches you need for your rod pocket at the top and your hem at the bottom (in this case, my "formula" for the DF looked like this: fabric length = finished length + 4"[rod] + 7"[hem]). Then you can figure out the measurements for the liner fabric based on that.\
Also, Sheila (comment #51) has some good points about curtain width.
Now you get to start the fun part -- sewing! :u)
-
Hem both the DF and the liner. With the wrong side facing you and the edge of the fabric intended for the lower edge of the drape pointed toward you, fold the bottom edge up 2" and press, then 5" more and press.
-
Now you are going to do something called a "blind hem". If you've never done one before, this video by Jenny T. (I don't know who she is, but she makes a mean "how to" video!) is a helpful tool to give you an idea of what it is and how to do it:
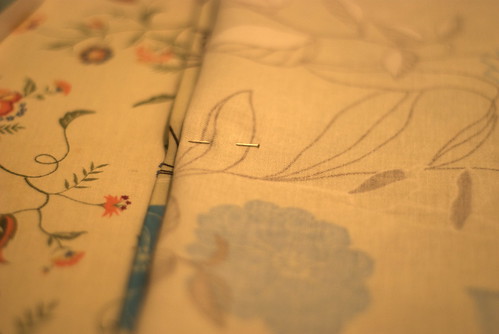
Here's my hem, all set up for me to sew it up with my super-special blind hem stitch (Actually I have a very basic machine, so I imagine nearly all machines have this stitch or something comparable or better. But don't tell my sewing machine. It thinks that it's a super special blind hem stitch, and we might as well let it. It just makes my sewing machine so happy.)
If all this nonsense about blind hems just makes your head hurt, just do a regular hem -- follow step 1 as directed, and then just go ahead and sew a straight seam across. I do encourage you to try, though -- it wasn't as hard as I thought it would be, and it gave me a great sense of accomplishment. And I learned how to sew a blind hem!
4. Now, sew up the sides with a 1/2" seam allowance. This isn't tricky at all -- just turn both your DF and the liner right side together (as if you were making a pillow), and sew up both sides. Make sure you match up the edges of the fabric from the top down.
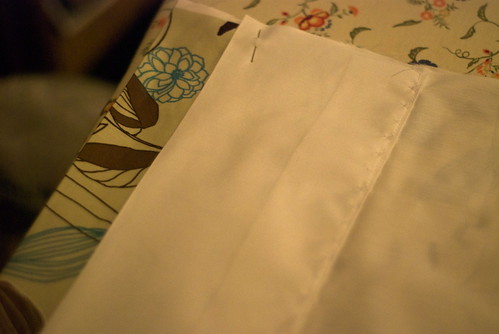
You will end up with extra DF at the bottom and center. This is okay. It's all part of the plan. I like lots (okay, 2") of extra DF at the bottom (I think I saw a hanging curtain like that once -- I don't know if there's a reason for the extra fabric), but if you prefer less, you can plan accordingly (cut more liner, or hem it up less).
5. Turn everything right side out, and press. You will have extra DF; make your crease with 2" (on either side) of the extra DF. This is where the extra 2" in the cutting guide image above comes in handy. Take a look at it if you're confused.
6. Next, you want to sew a seam all the way down both sides, to hold the crease you just made in place.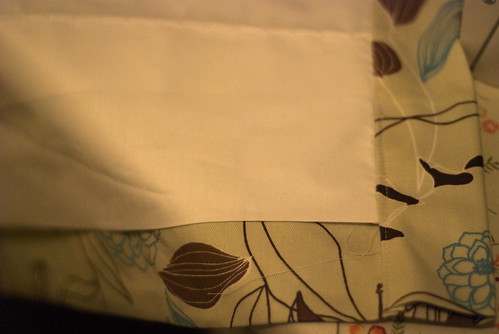
7. Lastly, make the pocket for your curtain rod. Fold the top (both the liner fabric and the DF) over 1" and press, and 3 more inches and press again. Sew along the bottom of this tube, making a tube that is about 3" tall.\
Yay! You're done! Hang your curtain and step back and admire your brilliant (and lasting!) handiwork!\

Feel free to add your own recommendations and/or corrections to my instructions in the comments (I really appreciate these, so don't hold back!)